

How To Use Bondo Repair Kit
Using Bondo to Repair Wood Rot saved our Outside Shutters from the burn pile! Here's the easy steps.
Using Bondo to Repair Wood Rot or Damaged Wood
Last yr, I decided I couldn't avert fixing our exterior shutters whatsoever longer. The bottom of each shutter had taken on water somehow and was rotting.
I knew right abroad I'd be using Bondo to repair the forest rot on these shutters.
We had our house painted a few years ago, and the painters used it to repair some harm to the columns effectually our front porch. It held up well.
So, why not utilise it again? Plus, it dries so fast, it makes the repair piece of work so much faster than normal wood filler.

Some links on this post are affiliate links. Equally an Amazon Associate I earn from qualifying purchases at no additional cost to you.
Now, let's go to the easy steps for how to use Bondo to repair wood rot!
What you Can Use to Repair Forest Rot
- Bondo All Purpose Putty or Bondo Wood Filler
- Bondo Spreader, 3 Pk
- Protective Gloves
- Sander
- Tools to Remove Soft and Rotten Woods: Utility Knife, Flathead Screwdriver, Chisel, etc.
- Optional: Bondo Wood Hardener
Picket This How To Video
Be sure to watch this video to see me really mixing and using Bondo to repair woods rot and damage on our exterior shutters.
Like shooting fish in a barrel DIY Steps to Fix Rotten Woods On Business firm Trim or Shutters, using Bondo
Quick Guide to Steps
- Clean away all soft wood rot or use wood hardener to harden the soft forest.
- Supercede big sections of missing wood with new wood.
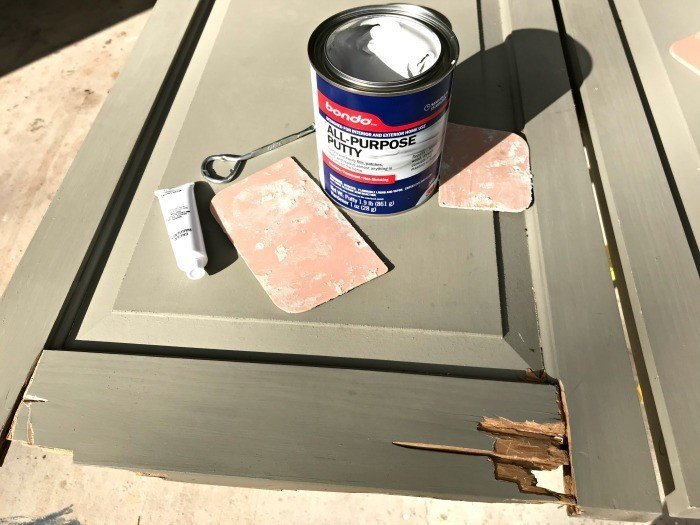
- Mix and employ Bondo All Purpose Putty.
- Sand smooth later on it hardens.
Continue Reading for a detailed caption of each step.
How to Use Bondo to Repair Woods Rot
Step One
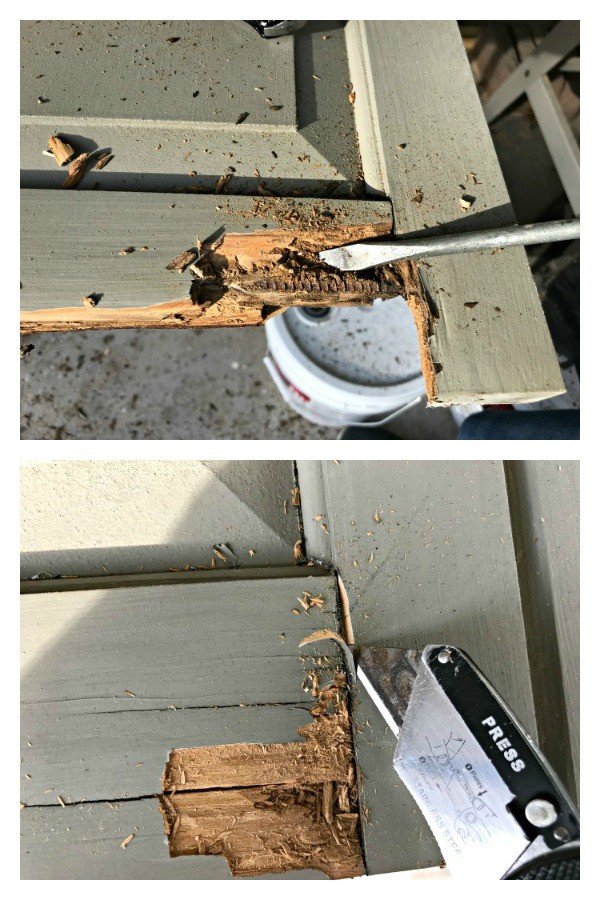
Start by cleaning and prepping the surface for Bondo. This tin be done in basically 2 ways. One is removing all the soft and rotten forest with chisels, utility knives, screwdrivers, or any you have on mitt. That's what I went with.
Two is, removing just any mold, then hardening the rotten, soft forest with Bondo Woods Hardener, earlier applying the Bondo Putty. I'd become with hardener on curvy or routed wood. It's hard to recreate that detail with wood filler or putty.
Step Ii
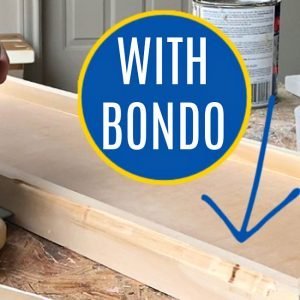
You lot may want to supercede large sections with wood, to create a skillful base and scaffold for the Bondo to stick besides.
1 of my shutters lost so much wood, that I replaced the bottom with new wood. Then filled in between the old and new with the Bondo.

Pace 3
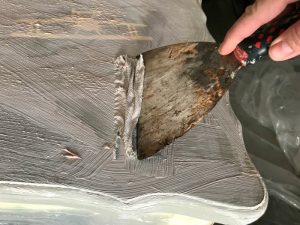
Once the surface is solid, hard wood and clean, you lot can apply the filler. Mix merely the amount y'all can utilise in near 5 minutes. Follow the directions on the Bondo. You lot can meet how I mix mine in the video.
When using Bondo to repair wood rot, e'er clothing gloves and work in a well-ventilated area. The fumes are quite strong and even combustible. Mix the Bondo, and then apply it to the area.
Spread it around with the spreaders. Effort to get information technology equally smoothen equally possible and filled over the level yous need it at. Be sure to wear a mask, while sanding!
Step 4
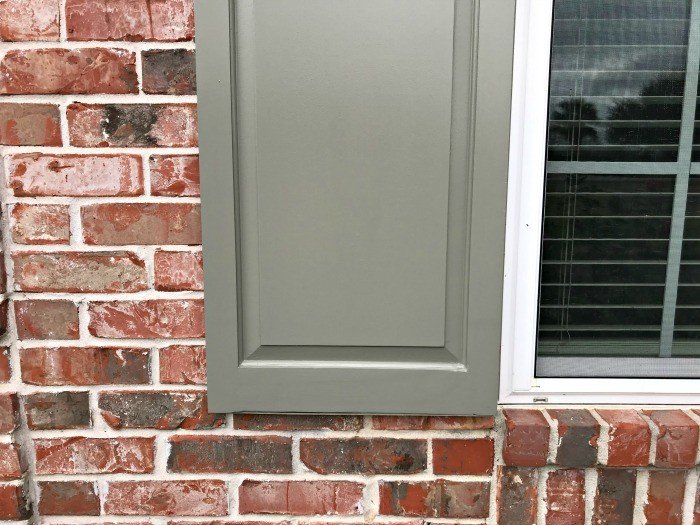
Let harden for 30 minutes, then sand shine with your sander. I used 80-grit to first, to brand quick work of the sanding. In one case, you've smoothed to the right level. You can decide if you lot need to add more Bondo.
I tend to but employ normal forest filler on shallow dings and divets. Once, the woods is smoothed and sanded to a medium grit, it's ready for a few good layers of exterior paint and primer.
Or, y'all can sand to a fine grit and stain or seal with an exterior-grade product.

I do not recommend patching large areas that will be stained. It is very hard to match the filler to the wood and volition likely look patched. But, smaller areas are less obvious and may work fine. It'southward easier to hide a large patch with paint.
And, be certain to use the Bondo wood filler, if you are hoping to stain the wood. The putty dries gray and doesn't stain well.
That's information technology for Using Bondo to Repair Forest Rot. Good luck with your repair! 🙂
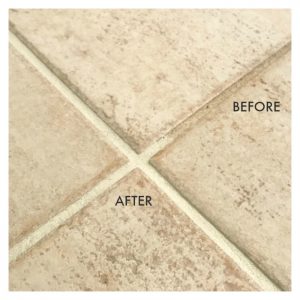
Looking for more handy DIY projects for your home? Check out my favorite way to set up ugly grout that won't scrub make clean.
Or, my steps for the easy way to strip paint from wood article of furniture.
Here'south How to Ready Damaged Wood Furniture with Bondo.
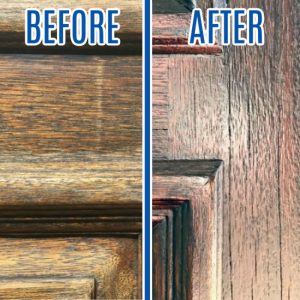
I love this easy DIY for How to Restain a Front Door without removing it.
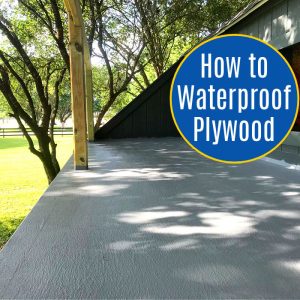
Effort this DIY for how to waterproof a plywood deck, roof or balustrade.
Thanks for checking out my Steps for Using Bondo to Repair Wood Rot.
Please let me know if yous take questions. Don't forget to sign upward for the Abbotts At Home electronic mail newsletter to get DIY, Remodeling, and Crafty ideas in your inbox.
Materials
- All Purpose Bondo
Tools
- Ability Sander
- Various Tools, similar a Chisel, Utility Knife, and Putty Knife
Instructions
How to Utilize Bondo to Repair Forest Rot
Quick Guide to Steps
- Clean away all soft wood rot or use Hardener to harden the soft wood.
- Supercede large sections of missing forest with new wood.
- Mix and utilise Bondo All Purpose Putty.
- Sand smooth after it hardens.
Continue Reading for a detailed explanation of each step.
Pace One
Outset past cleaning and prepping the surface for Bondo. This tin can be washed in basically 2 ways. One is removing all the soft and rotten wood with chisels, utility knives, screwdrivers, or whatever yous have on hand. That's what I went with.
2 is, removing but any mold, then hardening the rotten, soft wood with Bondo Woods Hardener, before applying the Bondo Putty. I'd become with hardener on curvy or routed wood. It's hard to recreate that detail with forest filler or putty.
Footstep Ii
Yous may desire to supervene upon big sections with wood, to create a practiced base and scaffold for the Bondo to stick likewise. One of my shutters lost and then much wood, that I replaced the bottom with new woods. Then filled in between the sometime and new with the Bondo.
Step Three
In one case the surface is solid, difficult wood and clean, you can use the filler. Mix but the amount you tin can use in about 5 minutes. Follow the directions on the Bondo. You can encounter how I mix mine in the video.
When using Bondo to repair wood rot, always wear gloves and work in a well-ventilated area. The fumes are quite strong and even combustible. Mix the Bondo, so employ it to the area.
Spread it around with the spreaders. Try to go it as smooth as possible and filled over the level you need it at. Exist certain to wear a mask, while sanding!
Step Four
Let harden for 30 minutes, and so sand smooth with your sander. I used lxxx-grit to kickoff, to brand quick work of the sanding. One time, you've smoothed to the right level. Y'all tin can decide if y'all need to add more Bondo.
I tend to just use normal wood filler on shallow dings and divets. Once, the wood is smoothed and sanded to a medium grit. It'due south set up for a few adept layers of exterior paint and primer. Or, y'all can sand to a fine dust and stain or seal with an outside-grade production.
I do not recommend patching large areas that will be stained. It is very hard to match the filler to the wood and will likely look patched. But, smaller areas are less obvious and may piece of work fine. It's easier to hibernate a large patch with pigment.
And, be sure to apply the Bondo forest filler, if you are hoping to stain the woods. The putty dries gray and doesn't stain well.
That's it for How To Use Bondo to Repair Woods Rot. Adept luck with your repair!

How To Use Bondo Repair Kit,
Source: https://www.abbottsathome.com/using-bondo-repair-wood-rot/
Posted by: kernsaftervince84.blogspot.com
0 Response to "How To Use Bondo Repair Kit"
Post a Comment